How to integrate Geo-fencing in an Android App?
02 September, 2020 by Nikunj Sorathiya in Android App Development
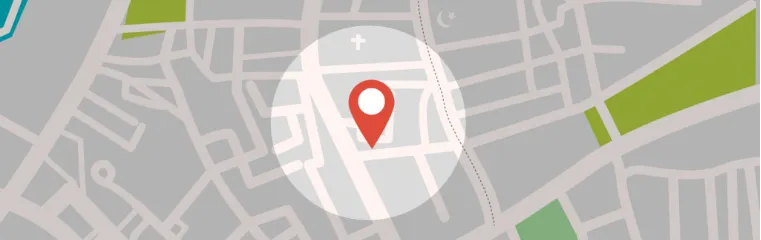
What is Geo fencing?
Geofencing is a service that triggers an action when a device enters or exits from the specified predefined location or geographical area for a given radius. This is a location-based service in which a creator of an app or other platform/software uses GPS, RFID, Wi-Fi or cellular data to send/trigger messages like SMS, Email or In-App/App-based notifications (pre-programmed action) when mobile devices that enter, exit center or remain parked in the geographical location.
Android allows you to create a geo-fence by specifying the radius and lat-long (short for latitude and longitude) of the center of the real geographical region that you wish to monitor.
There are smart companies that send product offers or specific promotions to consumers’ smartphones when they trigger a search in a particular geographic location, enter a mall, neighborhood, or store.
How Does Geo fencing Work?
So far, we’ve covered a lot about Geo fencing and what it can do for your business. Do you know how it works?
It’s simple though. Geo fencing helps you to keep in control of your business by notifying you when a potential consumer is passing by your store, by a competitor’s, or entering into a predefined area.
Advantages of Geo fencing in App
- It helps in targeting customers in shops or retail outlets with appropriate ads as well as direct them to desired sections in order to increase sales.
- It helps in influencing purchase decisions.
- It does not require additional hardware to implement it. Mobile apps are available for android and iOS operating systems.
- It is very easy to implement and use with the help of google maps.
- It is very cheaper due to less costly mobile phones and availability of free apps.
Disadvantages of Geo fencing in App
- The size and accuracy of the Geo fences depends on the location and positioning technologies used. The Geo fencing positioning technologies such as GPS, cellular and Wi-Fi deliver accuracy from 20 meters to 50 meters. Smaller Geo fencing use Bluetooth positioning technologies such as iBeacons and Eddystone beacons. These technologies deliver accuracy of about 2 meters.
- GPS positioning technique can also be used for Geo fencing but due to higher power consumption it is not recommended for battery hungry devices.
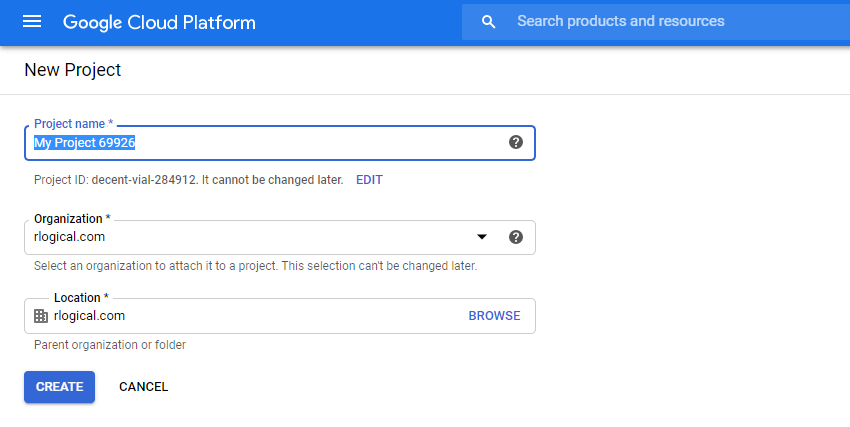
Obtaining a Google Maps API Key
Because this app uses Google Maps, you’ll need to obtain an API key.
- Open Google Cloud Platform and create a new project.
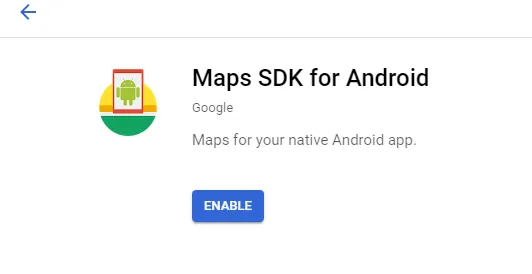
- Select APIs & Services ▸ Maps SDK for Android ▸ Enable.
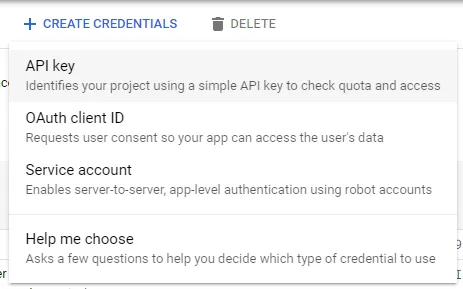
- Click on Credentials, Credentials in the API Manager, CREATE CREDENTIALS and then choose API key.
- Copy your API key value. In your project, replace YOUR_KEY_HERE with the copied value.
In your project level Gradle file add this
classpath 'com.google.gms:google-services:4.3.3'
In your app-level Gradle file add these
Using geofences requires the play-services-location library added to your project. To do that, open the build.gradle file for the app module and add the following dependency:
apply plugin: 'com.google.gms.google-services'

dependencies {
implementation 'com.google.android.gms:play-services-location:17.0.0'
implementation 'com.google.android.gms:play-services-maps:17.0.0'
}
In your Activity Class
You have to implements OnMapReadyCallback, GoogleApiClient.ConnectionCallbacks and GoogleApiClient.OnConnectionFailedListener in activity class
Define variable in activity class:
private static final int REQUEST_LOCATION_PERMISSION_CODE = 101;

public static final String GEOFENCE_ID = "RLOGICAL";
public static final float GEOFENCE_RADIUS_IN_METERS = 100;

public HashMap<String, LatLng> LOCATION_LIST = new HashMap<String, LatLng>();

private GoogleMap googleMap;
private GeofencingRequest geofencingRequest;
private GoogleApiClient googleApiClient;
private boolean isMonitoring = false;
private MarkerOptions markerOptions;
private Marker currentLocationMarker;
private PendingIntent pendingIntent;
Add Location for where you have to create geofence.
LOCATION_LIST.put(GEOFENCE_ID, new LatLng(23.029840, 72.557776));
Connect with Google API
GoogleApiClient is used with a variety of static methods. Some of these methods require that GoogleApiClient be connected, some will queue up calls before GoogleApiClient is connected; check the specific API documentation to determine whether you need to be connected.
googleApiClient = new GoogleApiClient.Builder(this) .addApi(LocationServices.API).addConnectionCallbacks(this).addOnConnectionFailedListener(this).build();
Secrets You Didn’t Know: How to Hire Android App Developers
Check Location Permission
The first step in requesting geofence monitoring is to request the necessary permissions.
If your app needs to access the user’s location, you must request permission by adding the relevant Android location permission to your app.
if (ActivityCompat.checkSelfPermission(this, Manifest.permission.ACCESS_FINE_LOCATION) !=
PackageManager.PERMISSION_GRANTED && ActivityCompat.checkSelfPermission(this,
Manifest.permission.ACCESS_COARSE_LOCATION) != PackageManager.PERMISSION_GRANTED) {
ActivityCompat.requestPermissions(this, new
String[]{Manifest.permission.ACCESS_FINE_LOCATION,
Manifest.permission.ACCESS_COARSE_LOCATION}, REQUEST_LOCATION_PERMISSION_CODE);
}
Start Location tracking
Used for receiving notifications from the LocationManager when the location has changed. These methods are called if the LocationListener has been registered with the location manager service using the LocationManager#requestLocationUpdates(String, long, float, LocationListener) method.
private void startLocationMonitor() {
Log.d(TAG, "Start Location monitor");
LocationRequest locationRequest = LocationRequest.create()
.setInterval(2000)
.setFastestInterval(1000)
.setPriority(LocationRequest.PRIORITY_HIGH_ACCURACY);
try {
LocationServices.FusedLocationApi.requestLocationUpdates(googleApiClient, locationRequest, new LocationListener() {
@Override
public void onLocationChanged(Location location) {

if (currentLocationMarker != null) {
currentLocationMarker.remove();
}
markerOptions = new MarkerOptions();
markerOptions.position(new LatLng(location.getLatitude(), location.getLongitude()));
markerOptions.title("Current Location");
currentLocationMarker = googleMap.addMarker(markerOptions);
Log.d(TAG, "Location Change Lat Lng " + location.getLatitude() + " " + location.getLongitude());
}
});
} catch (SecurityException e) {
Log.d(TAG, e.getMessage());
}
}
Start Monitoring Geo Fence tracking
Geofencing combines awareness of the user’s current location with awareness of the user’s proximity to locations that may be of interest. To mark a location of interest, you specify its latitude and longitude. To adjust the proximity for the location, you add a radius. The latitude, longitude, and radius define a geofence, creating a circular area, or fence, around the location of interest.
To add geofences, use the GeofencingClient.addGeofences() method. Provide the GeofencingRequest object, and the PendingIntent
private void startGeofencing() {
Log.d(TAG, "Start geofencing monitoring call");
pendingIntent = getGeofencePendingIntent();
geofencingRequest = new GeofencingRequest.Builder()
.setInitialTrigger(Geofence.GEOFENCE_TRANSITION_ENTER)
.addGeofence(getGeofence())
.build();

if (!googleApiClient.isConnected()) {
Log.d(TAG, "Google API client not connected");
} else {
try {
LocationServices.GeofencingApi.addGeofences(googleApiClient, geofencingRequest, pendingIntent).setResultCallback(new ResultCallback<Status>() {
@Override
public void onResult(@NonNull Status status) {
if (status.isSuccess()) {
Log.d(TAG, "Successfully Geofencing Connected");
} else {
Log.d(TAG, "Failed to add Geofencing " + status.getStatus());
}
}
});
} catch (SecurityException e) {
Log.d(TAG, e.getMessage());
}
}
isMonitoring = true;
}

@NonNull
private Geofence getGeofence() {
LatLng latLng = LOCATION_LIST.get(GEOFENCE_ID);
return new Geofence.Builder().setRequestId(GEOFENCE_ID).setExpirationDuration(Geofence.NEVER_EXPIRE)
.setCircularRegion(latLng.latitude, latLng.longitude, GEOFENCE_RADIUS_IN_METERS).setNotificationResponsiveness(1000)
.setTransitionTypes(Geofence.GEOFENCE_TRANSITION_ENTER | Geofence.GEOFENCE_TRANSITION_EXIT).build();
}

Start Intent service in background

private PendingIntent getGeofencePendingIntent() {
if (pendingIntent != null) {
return pendingIntent;
}
Intent intent = new Intent(this, GeofenceService.class);
return PendingIntent.getService(this, 0, intent, PendingIntent.
FLAG_UPDATE_CURRENT);
}

@Override
protected void onResume() {
super.onResume();
int response = GoogleApiAvailability.getInstance().isGooglePlayServicesAvailable(MainActivity.this);
if (response != ConnectionResult.SUCCESS) {
Log.d(TAG, "Google Play Service Not Available");
GoogleApiAvailability.getInstance().getErrorDialog(MainActivity.this, response, 1).show();
} else {
Log.d(TAG, "Google play service available");
}
}
Draw geofence on Google Map
If Google Play services is not installed on the device, the user will be prompted to install it, and the onMapReady(GoogleMap) method will only be triggered when the user has installed it and returned to the app.
@Override
public void onMapReady(GoogleMap googleMap) {

if (ActivityCompat.checkSelfPermission(this, Manifest.permission.ACCESS_FINE_LOCATION) != PackageManager.PERMISSION_GRANTED && ActivityCompat.checkSelfPermission(this, Manifest.permission.ACCESS_COARSE_LOCATION) != PackageManager.PERMISSION_GRANTED) {
return;
}

this.googleMap = googleMap;
LatLng latLng = LOCATION_LIST.get(GEOFENCE_ID);
googleMap.addMarker(new MarkerOptions().position(latLng).title("RLogical"));
googleMap.moveCamera(CameraUpdateFactory.newLatLngZoom(latLng, 17f));
googleMap.setMyLocationEnabled(true);

// Draw Geofence on Map
Circle circle = googleMap.addCircle(new CircleOptions().center(new LatLng(latLng.latitude, latLng.longitude))
.radius(GEOFENCE_RADIUS_IN_METERS).strokeColor(Color.RED).strokeWidth(4f));
} Connect with Google and Start Monitoring @Override
public void onConnected(@Nullable Bundle bundle) {
Log.d(TAG, "Google Api Client Connected");
isMonitoring = true;
startGeofencing();
startLocationMonitor();
}

@Override
public void onConnectionSuspended(int i) {
Log.d(TAG, "Google Connection Suspended");
}

@Override
public void onConnectionFailed(@NonNull ConnectionResult connectionResult) {
isMonitoring = false;
Log.e(TAG, "Connection Failed:" + connectionResult.getErrorMessage());
}
Service Class:
Define an Intent Service for geofence transitions
An Intent sent from Location Services can trigger various actions in your app, but you should not have it start an activity or fragment, because components should only become visible in response to a user action. In many cases, an Intent Service is a good way to handle a geofence transition. An Intent Service gets updates when an event occurs, such as a transition into or out of a geofence, and can start long-running background work.
When Location Services detects that the user has entered or exited a geofence, it sends out the Intent contained in the PendingIntent you included in the request to add geofences. A intent service like Geofence Service notices that the Intent was invoked and can then obtain the geofencing event from the intent, determine the type of Geofence transition(s), and determine which of the defined geofences was triggered. The Intent service can direct an app to start performing background work or, if desired, send a notification as output.
public class GeofenceService extends IntentService {

private static final String TAG = "GeoIntentService";
public GeofenceService() {
super(TAG);
}

@Override
protected void onHandleIntent(@Nullable Intent intent) {
GeofencingEvent geofencingEvent = GeofencingEvent.fromIntent(intent);
if (!geofencingEvent.hasError()) {
int transaction = geofencingEvent.getGeofenceTransition();
List<Geofence> geofences = geofencingEvent.getTriggeringGeofences();
Geofence geofence = geofences.get(0);
if (transaction == Geofence.GEOFENCE_TRANSITION_ENTER && geofence.getRequestId().equals(Constants.GEOFENCE_ID)) {
Log.d(TAG, "You are inside Rlogical (Geofence Location)");
} else {
Log.d(TAG, "You are outside Rlogical (Geofence Location)");
}

// Fetch Entering / Exiting Detail
String geofenceTransitionDetails = getGeofenceTrasitionDetails(transaction, geofences);
sendNotification(geofenceTransitionDetails);
}
}}
Create a detail message with Geofences received
private String getGeofenceTrasitionDetails(int geoFenceTransition, List<Geofence> triggeringGeofences) {
// get the ID of each geofence triggered
ArrayList<String> triggeringGeofencesList = new ArrayList<>();
for (Geofence geofence : triggeringGeofences) {
triggeringGeofencesList.add(geofence.getRequestId());
}

String status = null;
if (geoFenceTransition == Geofence.GEOFENCE_TRANSITION_ENTER)
status = "Entering ";
else if (geoFenceTransition == Geofence.GEOFENCE_TRANSITION_EXIT)
status = "Exiting ";

return status + TextUtils.join(", ", triggeringGeofencesList);
}
Send a notification
private void sendNotification(String msg) {

// Intent to start the main Activity
Intent notificationIntent = new Intent(this, MainActivity.class);

TaskStackBuilder stackBuilder = TaskStackBuilder.create(this);
stackBuilder.addParentStack(MainActivity.class);
stackBuilder.addNextIntent(notificationIntent);
PendingIntent notificationPendingIntent = stackBuilder.getPendingIntent(0, PendingIntent.FLAG_UPDATE_CURRENT);

// Creating and sending Notification
long when = Calendar.getInstance().getTimeInMillis();
NotificationManager notificationManager = (NotificationManager) getSystemService(Context.NOTIFICATION_SERVICE);

if (notificationManager == null)
return;

if (Build.VERSION.SDK_INT >= Build.VERSION_CODES.O) {

// Configure the notification channel.
NotificationChannel notifChannel = new NotificationChannel(msg, msg, NotificationManager.IMPORTANCE_DEFAULT);
notifChannel.enableLights(true);
notifChannel.setLightColor(Color.GREEN);
notifChannel.setVibrationPattern(new long[]{0, 1000, 500, 1000});
notifChannel.enableVibration(true);
notificationManager.createNotificationChannel(notifChannel);
}

NotificationCompat.Builder noBuilder = new NotificationCompat.Builder(this, "CH_ID")
.setTicker(msg).setContentTitle(msg).setOngoing(false).setAutoCancel(true).setWhen(when)
.setSound(RingtoneManager.getDefaultUri(RingtoneManager.TYPE_NOTIFICATION))
.setVibrate(new long[]{0, 100, 100, 100, 100, 100}).setSmallIcon(R.mipmap.ic_launcher_round);

notificationManager.notify((int) when, noBuilder.build());
}
In your Manifest add the below
Uses Permission
<uses-permission android:name="android.permission.ACCESS_FINE_LOCATION" />
<uses-permission android:name="android.permission.ACCESS_COARSE_LOCATION" />
<uses-permission android:name="android.permission.INTERNET" />
Inside Application tag:
<service
android:name=".GeofenceService"
android:enabled="true"
android:exported="true" />
<meta-data
android:name="com.google.android.gms.version"
android:value="@integer/google_play_services_version" />

<!--      The API key for Google Maps-based APIs. -->
<meta-data
android:name="com.google.android.geo.API_KEY"
android:value="@string/YOUR_KEY_HERE" />
How Rlogical Techsoft helps for develops Android Geo-fencing App?
Rlogical Techsoft is a leading IT company known for web & mobile app development in India. We have expertise in providing app solutions based on Geo-location leveraging Geo-location based mobile app development and solutions.
Contact us with your requirements for development of Geofencing apps in Android.
Nikunj Sorathiya
Nikunj Sorathiya is Sr. Android Developer at Rlogical Techsoft Pvt. Ltd. He is passionate about Android and expert in building an innovative Android Application Development.
Related Blog
Categories
- All
- Amazon Web Services (AWS)
- ASP.Net Development
- Azure Web App
- Big Data Analytic
- Customize
- Digital Marketing
- Drupal Development
- E-commerce web development
- Education Mobile App Development
- Enterprise Application
- Event Management App Development
- Fintech
- Fitness App Development
- Food Delievery
- Front-End Development
- Healthcare App Development
- Hire Dedicated Developers
- Hotel Booking App
- IT Industry
- JavaScript Development
- Mobile App Development
- On Demand App Development
- On Demand Healthcare App Development
- PHP Development
- POS Software Development
- Real Estate Mobile App Development
- Retail Business App Development
- Salesforce
- Social Media Development
- Software Development
- Technology
- Transportation App Development
- UI/UX Design
- Web Design
- Web Development
- Web Services
- Web/Data Scraping Services
- WordPress
Get in Touch
Contact Us
Locate Us
Locate Us

India (Head Office)
701 & 801 Satkar Complex, Opp Tanishq Showroom,Behind Lal Bungalow, Chimanlal Girdharlal Rd, Ahmedabad, Gujarat 380009
Japan
301 1-28-21 Hayabuchi, Tsuzuki-ku, Yokohama-shi, Kanagawa 224-0025, Japan

